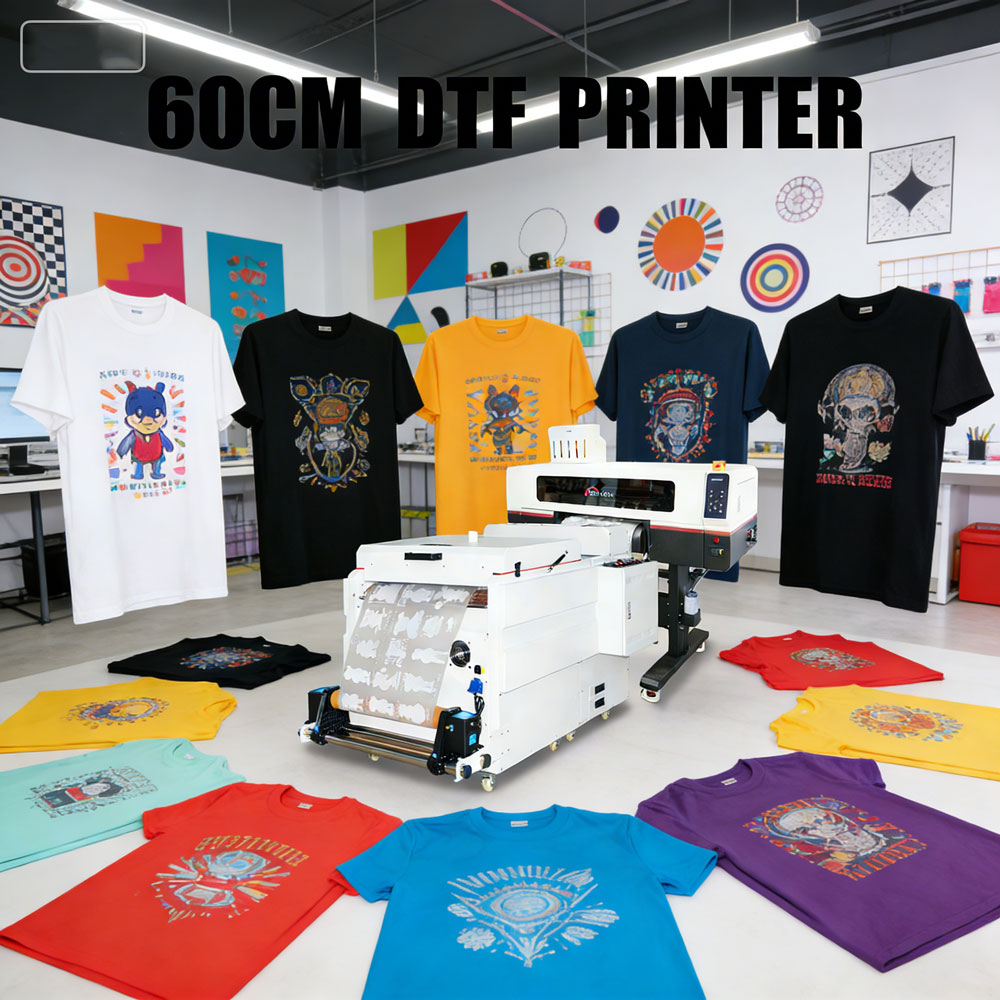
Printing custom designs on cotton T-shirts at home has become far more accessible thanks to Direct-to-Film (DTF) technology. This method lets you create vibrant, durable prints without needing large industrial machines, and it works exceptionally well on 100% cotton fabrics. For home crafters, hobbyists, or small business owners dipping their toes into apparel printing, DTF is one of the most practical choices right now.
Contents
What Makes DTF Printing Ideal for Cotton
DTF is essentially a process where your design is printed onto a special film then transferred to fabric using heat and pressure. Unlike many older techniques, DTF doesn’t require specialized pretreatment of cotton before printing, which simplifies the workflow for beginners. It also produces bright, detailed images that bond well with cotton fibers, giving you long-lasting results.
In my experience, one of the biggest advantages of DTF for home printing is that you can achieve professional-looking results with relatively modest equipment — provided you follow the steps carefully.
What You’ll Need
Before you begin, gather the essential tools and materials:
- DTF Printer: A printer capable of handling DTF inks and film.
- DTF Film: This is the special transfer medium your design will be printed onto.
- Pigment-based DTF Inks: These give you vibrant colors and good wash durability.
- Hot Melt Adhesive Powder: Applied over the wet ink on the film, this powder helps the design stick to the cotton.
- Heat Press: A must for transferring the design properly — a household iron won’t apply consistent heat or pressure.
- Blank Cotton T-Shirt: Use a quality, 100% cotton shirt for best results.
Getting the right setup makes a big difference. An inexpensive heat press with a digital temperature display is worth the extra cost compared to cheaper, less precise alternatives.
Step-by-Step: DTF Printing on Cotton at Home
1. Prepare Your Design
Create your artwork in a graphics program, making sure the colors and resolution are suitable for printing. Save the design as a mirrored image if your software doesn’t do this automatically, since it will be transferred face-down onto the fabric later.
2. Print onto the DTF Film
Load the DTF film into your printer and print the design. Take your time here — dust, smudges, or misfeeds can all impact how clean the final print looks on the shirt.
3. Apply the Adhesive Powder
While the ink is still wet, evenly sprinkle hot melt adhesive powder over the design. Shake off excess powder so only what’s needed remains. That powder is what ultimately bonds the ink to the cotton fibers.
4. Cure the Powder
You now need to cure the adhesive powder by applying heat without pressing it into the fabric yet. This can be done with your heat press or other heat source, following whatever temperature and time guidelines come with your powder and film. This step turns the powder into a tacky, bond-ready layer.
5. Transfer to the Cotton Shirt
Lay your cotton shirt flat in the heat press. Position the printed DTF film (ink side down) where you want the design. Protect the setup with a Teflon or parchment sheet to prevent scorching. Press according to recommended temperature and time for cotton (typically around medium heat for about 10–15 seconds).
6. Cold Peel
Once the press cycle is complete, let it cool before peeling off the film. This “cold peel” method helps the adhesive finish melting into the cotton fibers and dramatically improves adhesion.
7. Final Press (Optional but Recommended)
For extra durability and a smoother feel, lay a protective sheet over the design and press again for a few seconds. This final step knocks down any edges and seals the print into the fabric.
Tips for Better Results
A few best practices make home DTF printing much more reliable:
- Use a lint roller or pre-press your cotton shirt briefly to remove wrinkles and debris before transfer.
- Make sure your heat press settings are consistent — too low and the print won’t bond fully; too high and the shirt can scorch or the design becomes stiff.
- Choose quality adhesive powder and film. Cheaper supplies often yield prints that crack or peel after washing.
From my hands-on perspective, the feel of a DTF print on cotton is slightly different from ink fused directly into the fibers (as in true direct-to-garment printing), but DTF more than makes up for that with vibrancy and durability at home-friendly workflow.
Is DTF the Best Method for Cotton?
There are many printing methods out there, but DTF hits a sweet spot for home users because it doesn’t require expensive pretreatment or fabric-specific inks, and it works on virtually any fabric type including cotton, polyester, and blends.
That said, some home printers report slight texture or raised feel where the adhesive sits on top of the fabric — this is normal for DTF. If you’re after a very soft, “ink-inside-the-fiber” feel, direct-to-garment (DTG) might be worth exploring later as your skill and investment grow.
Final Thought
Home DTF printing on cotton opens up creative possibilities without the need for a full shop setup. With the right tools, attention to detail, and the steps above, you can produce bright, durable custom T-shirts that rival what pros can make — all right from your own workspace.