Using Direct-to-Film (DTF) transfers to decorate garments doesn’t always require expensive equipment. While heat presses are the standard tool for applying DTF prints, a household iron can serve as a budget-friendly alternative if you understand its limitations and handle it correctly. This guide explains how to use an iron for DTF, what equipment features matter, common mistakes to avoid, and whether this approach is suitable for serious print quality.
Contents
What It Means to Use a Regular Iron for DTF
DTF printing normally involves printing on special film, applying adhesive powder, curing the powder, and then transferring the design to fabric using controlled heat and pressure. A heat press excels at precisely maintaining temperature and consistent pressure across the design area. An ordinary household iron, in contrast, was not engineered for this task — but with patience and technique it can still fuse DTF transfers onto garments for small-run or hobby projects.
Personal judgment: An iron can work in a pinch, but it never replicates the consistency of a proper press. For occasional use or testing designs, it’s a cost-saving approach; for reliable commercial results, invest in better tools.
Why Consider a Regular Iron?
Cost-Effective: A quality heat press costs significantly more than a household iron. An iron lets beginners experiment without major investment.
Compact and Familiar: Irons are ubiquitous, lightweight, and easy to store and use — ideal for crafters working from apartments or small spaces.
Beginner-Friendly Setup: Unlike presses that require calibration, irons are simple to operate — though this simplicity comes with tradeoffs in consistency.
Real-World Caution: Even though irons are inexpensive, they cannot deliver uniform pressure or steady heat like a press. This means transfers may adhere unevenly or peel over time, especially after washing. If durability and consistency matter, a basic heat press is worth the investment.
Choosing the Right Iron Features
Not all irons are equally effective for DTF:
1. Adjustable Temperature:
Ideally, you should control the temperature rather than rely on preset settings. DTF transfers generally need around 300–320°F (150–160°C) to bond properly.
2. Even Heat Distribution:
Irons often have hot and cool spots, which can lead to uneven bonding. A flat ceramic or non-stick soleplate spreads heat more consistently across the design area.
3. Steam Control:
Steam is helpful for removing wrinkles before pressing, but must be turned off during application. Moisture can weaken adhesive bonds and ruin prints.
Practical tip: Even with good features, a household iron’s heat variance remains significant. For critical or bulk prints, a heat press is more reliable.
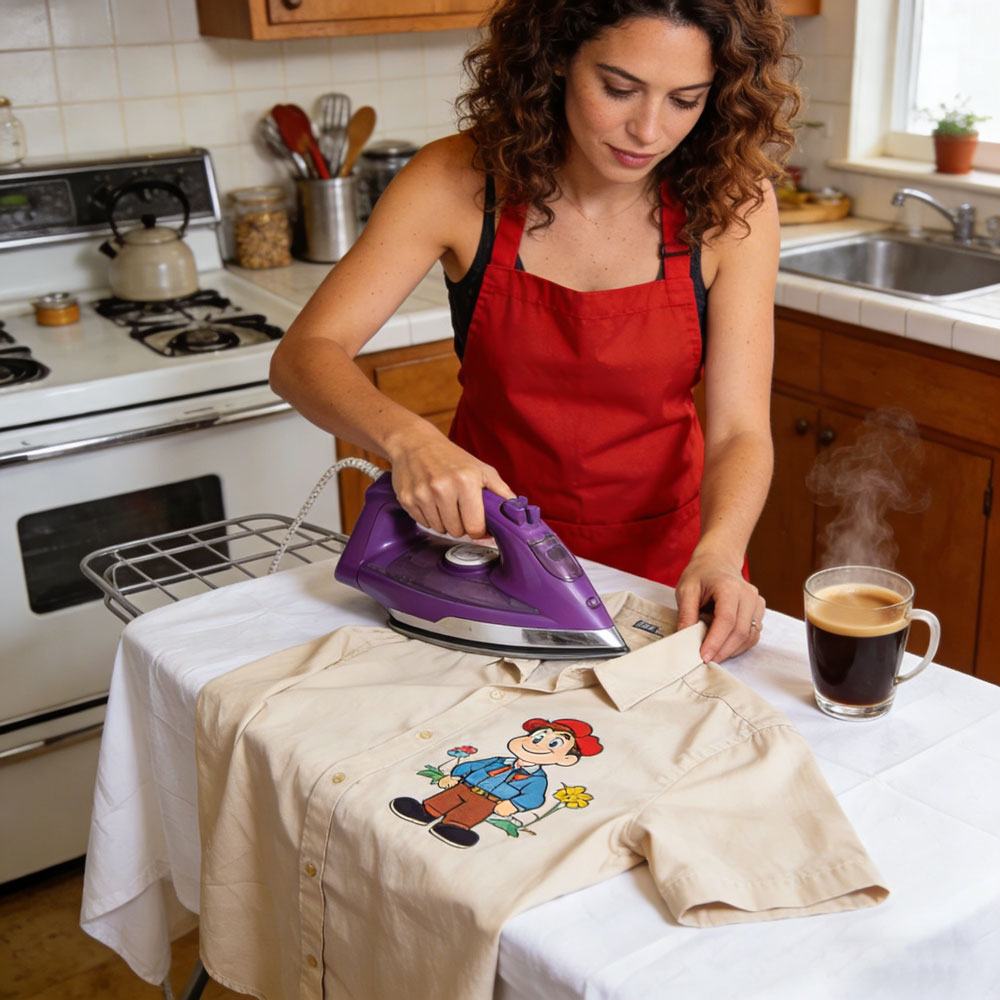
Step-by-Step: Applying DTF Transfers with an Iron
- Prepare the Garment:
Wash and iron the garment to remove moisture and wrinkles. Place it flat on a firm surface. - Preheat the Iron:
Set to the recommended temperature and allow it to stabilize. High settings like cotton/linen are closer to the temperatures DTF adhesives need. - Position the Transfer:
Place the DTF film printed side down on the fabric. Cover with parchment paper or a protective sheet to prevent contact between the iron soleplate and the film. - Apply Heat and Pressure:
Press firmly and steadily. Hold the iron in place (or move it slowly) for approximately 20–30 seconds per section of the design. Watch carefully to avoid scorching. - Cool and Peel:
Let the transfer cool briefly before peeling the film. Cooling helps the adhesive set more consistently.
Common Mistakes and How to Avoid Them
Incorrect Temperature:
Too low and the adhesive won’t bond; too high and heat can scorch the fabric or distort the print. Use a thermometer if possible.
Insufficient Pressure:
An iron doesn’t apply pressure uniformly. Press firmly and evenly across all areas of the design.
Rushing the Process:
Impatience is a frequent cause of poor adhesion. Giving the adhesive enough time and cooling it properly improves durability.
Skipping a Test Run:
Always try a test on scrap fabric to refine your heat, pressure, and timing before applying a final design.
Can You Expect Professional Quality?
A household iron can produce visible results, but it will almost always fall short of the durability and consistency achievable with a dedicated heat press. Many experienced users report that iron-based applications may not withstand repeated wash cycles and can peel earlier than professionally pressed designs.
Personal insight: Using an iron is best suited for prototyping, experimentation, or very small runs. If you intend to sell garments or create items that must endure frequent washes, even an inexpensive heat press significantly improves longevity and performance.
Final Recommendation
A regular iron can work for DTF transfers in a pinch, especially for learning the process or low-volume crafting. However, the lack of consistent heat and pressure makes it a stopgap solution, not a sustainable method for repeatable high-quality results. Investing in a basic heat press — even a small, affordable unit — is advisable if you want professional reliability.